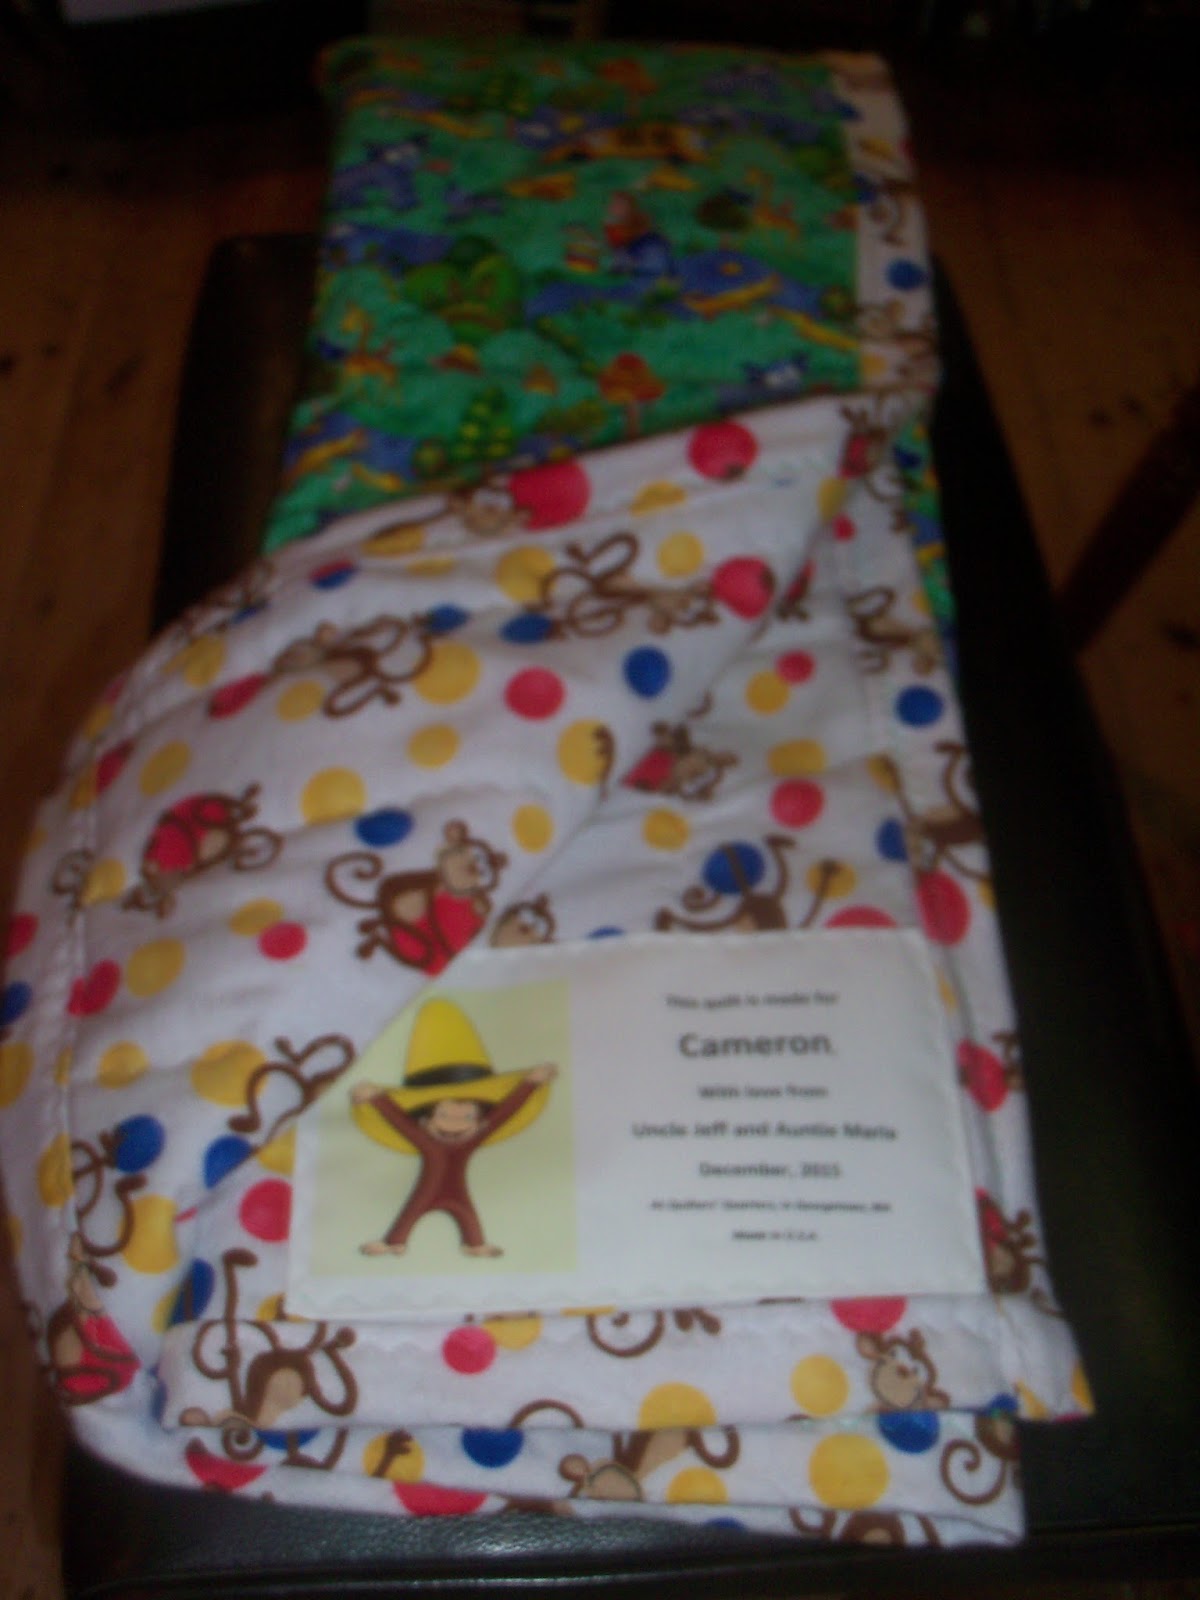
It's not really Christmas unless there's a last minute project to work on ... and I was happy to have in the shop what was needed for this requested baby quilt!
A soft white flannel with a monkey print and primary color balls (which reminds me of the Wonder Bread wrappers) for one side, and the binding, and a sweet fabric titled "Curious" (but not George?) for the other side ...

3 oz. polyester batting and Ricky Tims green thread with Alex Anderson's white thread... Merry Christmas to Jeff and Maria's nephew, Cameron~


It was fun making a quilt for a one-year-old, a week before Christmas... life the way it ought to be!
Now, back to the ballerina quilt!
December 15, 2015
Here's a sneak peek of the ballerina quilt ... the back is comprised of 80 nine inch blocks in a duo-diagonal patttern ... can't tell you how many single blocks I had to frog (rip it rip it) to get the pattern to come out right!
And I finally have a plan that will make this quilt remarkably different in appearance but still functional on a bed (and in a washing machine!)
Stay tuned!

December 11, 2015
A friend called to offer a five drawer Singer treadle table to me, in case I knew someone who was looking for one. Well, of course I did. And I had just the machine to pop into it for her. Trouble is, the machine was just a smidgen too wide and won't tuck down into the table. So Rick and I removed the extension leaf that would have covered the machine if it did fit, and I made another fabric dust cover to take its place and keep the machine dust-free! My quilting student 'Becca was very surprised when her Mom brought her to the shop for fabric and instead she found the machine waiting for her! (The machine is an abandoned Japanese Singer model 15 clone, which we converted to a hand crank.)
 |
| Japanese clone machine, Chinese repro hand crank, and an all-American Singer five drawer treadle cabinet. |
 |
| Here's the happy quilter with her new-old machine and its dust cover made especially for her. |
 |
| And here is Becca with her very pretty first quilt, all her own design! |
November 30, 2015
I've worked this past week on a "Round Robin" row for a fellow quilters' quilt. There are eight of us in the guild participating in this activity. We have a month to complete a row, then exchange bags and another month to complete the next quilter's row, and so on for eight months... I'll post the rows as I complete them. Meanwhile, I'll keep up with the ballerina quilt, and the Moda Sampler Blocks (which have their own page at the blog...)
Here's Round Robin Quilt 1's row: the owner's original row on top, and my addition on bottom. Her only request was that her quilt is to be made totally of Batik fabrics ... I had never sewn with Batiks before, and found I love the strength of the fabric and the fact that the reverse and the front are identical! I also learned a great deal about 'scant' quarter inch seams and their role in getting points to meet in the center of a block! And as her notes suggested that she likes star blocks ... Not too bad ... but still some room for improvement.


November 19, 2015
 I have finally had the courage to cut into the beautiful ballerina costumes of my niece, to begin making her requested quilt. I have hemmed and hawed over how best to make use of the beautiful fabrics, including the tu-tu nettings, and have asked her which costumes are her favorites in order to portion out the multitude of colors and styles. I've decided on seventy blocks, ten rows of seven 9.5"blocks each, resulting in a 66" x 90" quilt. Here's the first block, challenging in that it includes sequins and netting of a child-sized costume. Yellow is one of her favorite colors. The costume fabrics exceed the size of the foundation fabric, and will eventually overlap each other when the blocks are assembled.
 October 30, 2015
 We have been working on a new quilt for a veteran ... each of the seven members of our group are making our own pattern for five blocks ... we'll come together then and arrange the thirty five blocks into a pleasing design, and then join the blocks into rows and the rows into a full quilt. Stay tuned for the final design, but in the meantime, here is what I've created for my five blocks. This is a Quilt as you Go project.
Otober 18. 2015 The traditional birthday quilt: my sister Rosemary and her husband Jim enjoy sailing, so a quilt honoring the sea, the roses, and the lighthouses and night sky seemed in order...
 |
| Jim, Rick and I showing the quilt to Rosemary |
 |
| Ro and Jim, Rick and I with the light house - night sky side. |
 |
| The quilt label, a good use for a Row by Row™ Post Card |


October 12, 2015: Sneak Peeks

 Not telling who this one is for, but giving you sneak peeks of small parts:

September 25, 2015 More for Idaho Fire Victims
This week we closed the quilt shop so that I would have more time in the house working on quilts. I finished four more juvenile quilts for the cleft palate patients in the Phillipines - unfortunately, I forgot to snap photos of the last three before having Rick deliver them to Lisa.
 Today, I was able to make a jelly roll quilt for the fire victims in Idaho. The wheel of 2.5" strips is by Quilting Treasures, and titled "Basic." I never know how the quilt top will look, as the strips are joined together as they come off the row, and then the pattern emerges as the end of the very long strip is joined to the beginning, and then it is done again, and again ... from one strip measuring 1,761 inches (that's almost 49 yards long!) to half that size, then one quarter that size, then one eighth that size, then one sixteenth that size, growing correspondingly in width from 2" to 32" row by row. Here's what emerged from two rolls of twenty 2.5" x 44" strips.
I also continued to add rows to the nine patch / rail fence quilt top made with the Waverly fabric's 40 strip roll. It's not finished yet, but needs only two more final vertical rows attached. Tomorrow, it and the jelly roll quilt will be mailed off to Idaho. So far, we have sent five quilt tops and a handful of large blocks to the quilters in Idaho who are finishing these for the families who lost everything in the wildfires this summer.
September 19, 2015 Time to Tote!
I made a sweet little juvenile tote bag today; reversible, cross-body style, it took only two fat quarters and four inches of 44" wide cotton fabric. I made it while chatting with a former student and her mum at the table in the shop; I was using my 1917 Red Eye Hand Crank model 66 ... so quiet, smooth, and strong!
 |
| Reversible: Inner lining can become the outside! |
 |
| Long, cross-body strap for easily carrying treats home! |
 |
| This one is for the adults ... large enough for a quilt, or knitting stash, or books from the public library's annual book sale! |
September 14, 2015


And today, back to the fire victims in Omaha. I have struggled a bit with the nine patch / rail fence quilt, adding borders and changing design plans. So far I have finished only the center of the quilt, but the rest will go fast as I've worked out the dimensions to reach a queen size top. There are a few corners that are not perfectly level, but sometimes the quilted is able to "quilt it out." It is still looking wider than long, but that will change as I add more sashing, and eventually the outer borders.
September 7, 2015
 Now I'm realizing that the quilt will not be a large size as requested in Idaho, so I am tinkering with ways to add sashing. I've also made some of the blocks in the rail fence style, to add more interest to the quilt. These blocks are laid out just as a sample to 'audition' the black sashing ... I don't really have all that many red strips and squares, as you can see in yesterday's photo. I'll space them more carefully when all the blocks are assembled together... optimistically tomorrow!
September 6, 2015
I've been working on quilt tops to send out to Idaho, where families have lost everything to the wildfires that are ravaging many states in the far west. I have a few friends also contributing quilt tops and large quilt blocks. April and Carmon Henry, the Featherweight experts and owners of April 1930s Featherweight Shop posted a call for donations, as they and their neighbors and friends are finishing these blocks into full size quilts; their goal is that every one of the more than fifty families who have lost their homes and possessions to the fires will have at least one new quilt made specifically for them, given with love and care.


September 4, 2015
 |
| This dust cover measures 22" in width, to accomodate the full size Singer 66 and its hand crank. |
 |
| Fiona, Rick and I with her new 100 year old Singer |
We brought the machine back to her last night, set it in its treadle cabinet with the hand crank attached, and went to load a bobbin and belatedly realized she needs a new bobbin tire. Cindy Peters will mail it out to us Tuesday after the Labor Day Holiday. It will cost a full $0.50 ~ that's even less than the Grip 'n Snip thread cutters I got online for 64 cents! I asked Cindy, if she has enough, to send me five at that price, as my own four Red Eyes will need them eventually! Meanwhile, Fiona can always wind her bobbins on her portable electric sewing machine.
August 25, 2015
We delivered Tristan's 'off to college' quilt today in Maine. And yesterday, with the quilt, the pillow case and two toss pillows finished, I decided to use some of my fabric featuring Vintage Sewing Machines to make a dust cover for my white Featherweight, which doesn't have a case. I found a video online featuring Debbie Shore, who demonstrataed using Bosal sew-in foam. In a half hour, she had finished the dust cover, with tidy, perky, uniform corners. As this was my first attempt at using the foam, my corners are not a perfect as Debbie's, but they'll do, I'll make two more for the black Featherweights, which do have cases but are rarely in them.

And then, next up: the ballerina's costume-fabric quilt!
August 22, 2015
I had a "short stack" of jelly roll strips that I'd found on eBay last year. I've been hearing about the jelly roll quilt race, and watched a few videos from the Minnesota Quilt Company featuring their spokesperson, Jenny. So yesterday, after the shop closed and we'd had supper, I decided to try my hand at this.
The ten or twelve strips that I had made a quilt top that measured 24" x 30". I found a bolt of yellow blender fabric in the shop, cut enough for the back of the quilt and the binding, pieced some left over 3oz polyester binding to fit the small quilt and tonight put the sandwich together, quilted along the strip seams with a serpentine stitch and my walking foot on the Bernina 125, with white thread.
And voila! Beautiful colors, a quick finish, and a pretty sample to show in the shop. Maybe someone will see this small one and want to buy a jelly roll or two to make a larger one! I do have some beautiful collections in stock.
 |
| This corner shows some of the beautiful colors |
 |
| This is a horizontal shot of the little quilt, showing how the strips come together in a random pattern of colors |
 |
| Wherever two strips meet, there is a diagonal seam which adds visual interest to the quilt. |
 |
| The quilting along the two inch strips makes a nice tight pattern that will wear well when tugged around by someone's toddler one day! |
August 13, 2015
Tristan's College Quilt~
 |
| Night Side of "Tristan's Path" |
Our grandson Tristan chose this pattern from a book of quilts a few years ago, not knowing what its name and variations of it might be.

The fabric is so very soft and yet strong ... seashells, on white and blue backgrounds, with the fabrics blended in a 'drunkard's path' pattern with a sober stability imposed on the classic design, reflecting our confidence in his ability to make wise decisions in his life. An inner border of delft shimmer fabric for the Atlantic Ocean, and outer borders of Maine's blueberries one one side and a beautiful night sky fabric on the other, bound again with the shimmering sea, as Maine is.
The pillow case is made from the Quick and Clever Pillowcase Pattern posted at my webstore.
 |
| Night side, with beautiful night sky border |
 |
| Quick and Clever Pillow Case |
 |
| Day side, with blueberry border |
And of course, a college quilt must come with throw pillows. It's quite a stack when all put together. I used the Row by Row™ Massachusetts' Post Card fabric for his quilt label:
 |
| Two toss pillows of the original fabric |
 |
| It's quite a pile of pillows and quilt |
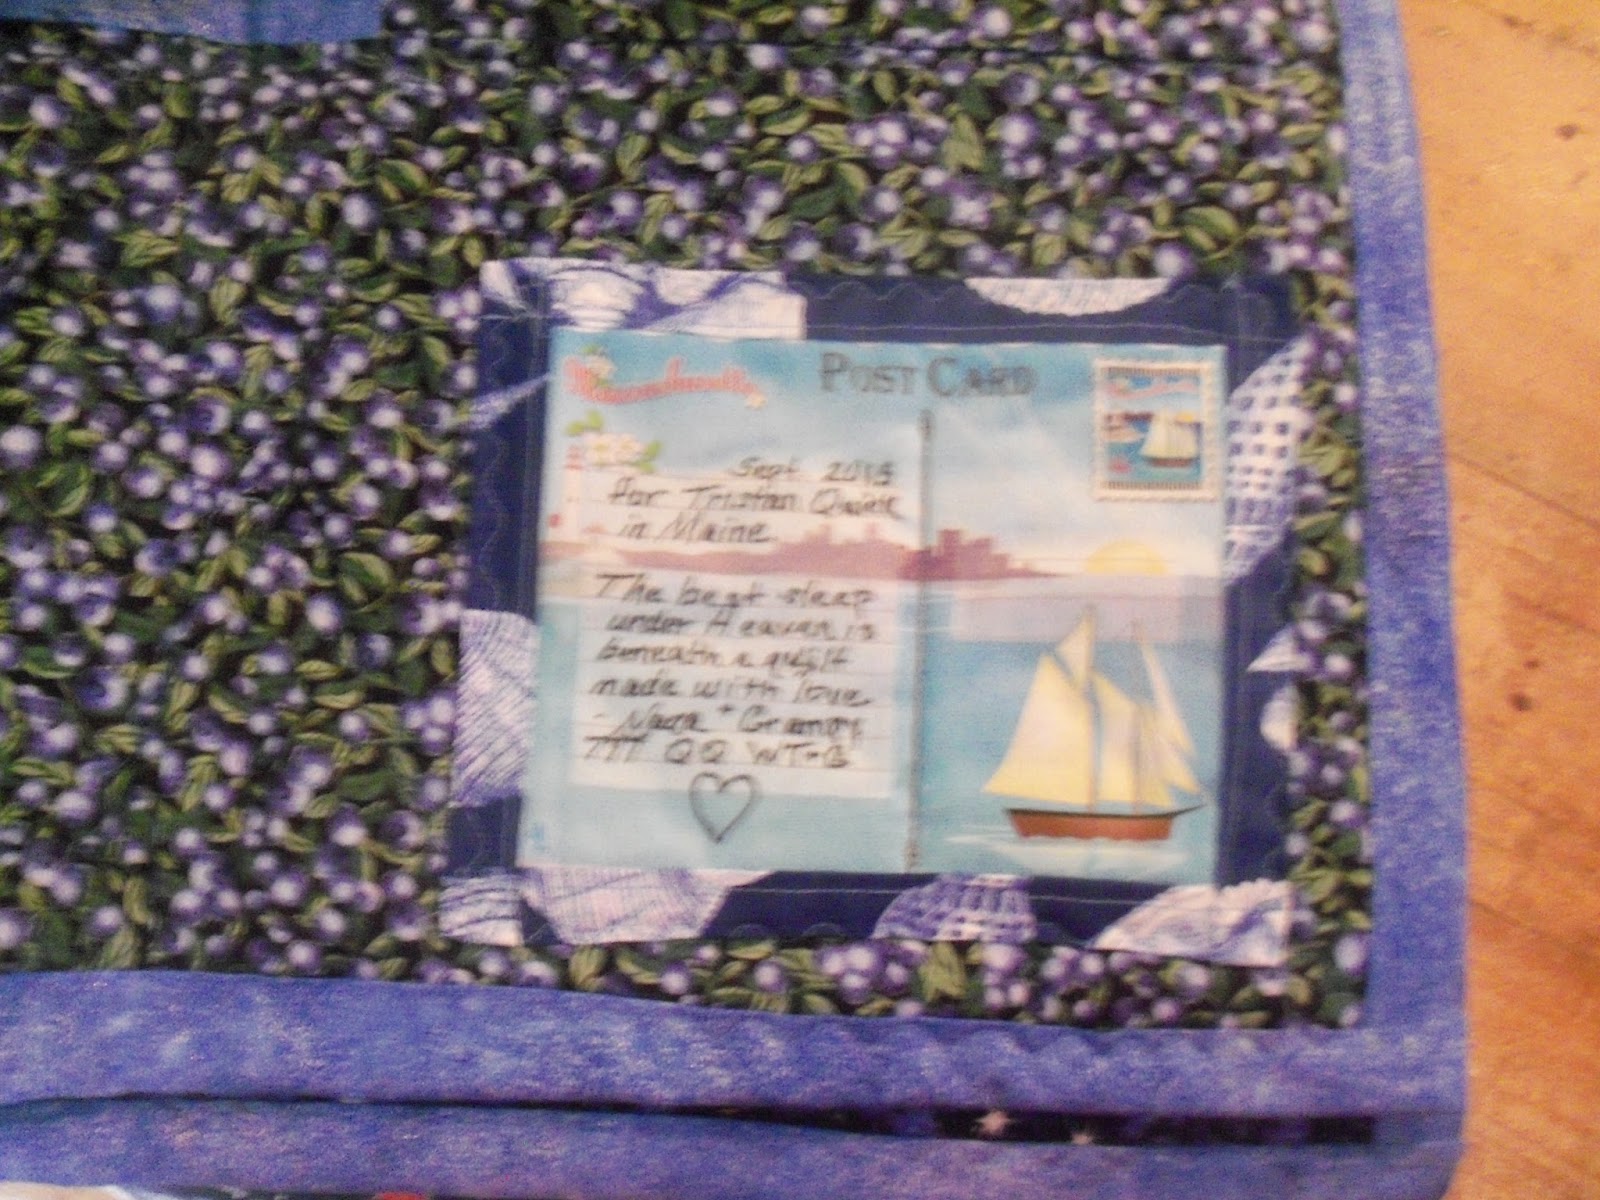 |
| Here's his special quilt label ... a true collectible as his Nana is the ONLY Massachusetts quilt shop to have ordered these! |
a little interruption


While I had the fabrics out, I made a few reusable, washable sandwich and snack bags, as seen on 24 Blocks Facebook page. I'll offer that as a Friday night Sit 'n Sew free pattern. It takes only 7" x 18" for a sandwich bag, and less for a smaller snack bag.
And, with my family and friends' help, I've chosen the borders for Tristan's quilt. More about that when I begin quilting them.
July 9, 2015
Back to the Quilts
I've added one small border to Tristan's quilt, just enough to define the outer edge of the center panel of each side. I won't add more borders until I complete the quilting of the center. I started by cutting batting to size , sandwiching it between the front and back panels with my favorite pins (flat flower heads) and marking the center point, then working outward with pins at every second seam.
Satisfied that it was now centered with matching edges, I began lines of serpentine quilting running diagonally from left top corner block to where that serpentine path ended near but not at the bottom right corner. Then I turned the quilt top to bottom and did it again, using the corners of the blocks to guide my (unmarked) quilting lines.

My first two lines of quilting run just to either side of the center, starting at opposite corners. I'll continue working outward row by row, and then will flip the quilt over to run similar diagonal lines of quilting following the reverse side's wandering paths. Then I'll be ready to add wider borders of night and day skies to bring this quilt up to a bed size (it currently is about the size of a lap quilt.
July 4, 2015
 Happy Independence Day!
I've been busy the past two weeks making kits for the 2015 Row by Row™ "Windows on the Water" pattern.
But in the last two days, I was able to make the Row by Row™ Tote Bag, using the free pattern provided by Timeless Treasures, who produced the fabric for this water-themed year. I did order one of their Tote fabrics, and am selling those in 1/2 yards with the free pattern downloaded and printed for my quilting visitors.
I didn't purchase the remaining fabrics as I know each quilter has their own stash of favorite but as yet unused fabric, and thought this might be a good project for that. I chose to use the Buoy Fabric by Benartek for the bag body, the Timeless Treasures Row by Row fabric for the outside pocket, and a floral print thin cotton for the linings.
 What is most satisfying to me, though, is that I made the tote totally on my hand crank machines out in the shop. I began it on the 99, then moved to the Red Eye 66, and then back to the 99. Both machines are still awaiting new check springs for the upper tension assemblies, but even with the damage I'd done to those springs when I tried to remove them ('unspringing" their slinky-like appearance) they maintained a nice even stitch through a full bobbin and more of quilting!
 The straps of the bag are made of scraps of the water fabric rows ... I pieced the straps with six inch lengths of water, wrapped the thirty inch long strip around regular 3 oz. polyester batting (which I also used between the bag fabric and the lining) and quilted both the straps and the bag itself with multiple verticle columns of stitches. I also lined the outer pocket with the floral cotton and did a few rows of curvy horizontal rows of quilting, following the print of the fabric. The pattern itself was a bit squirrely about how to fold and stitch the box corners at the bottom, but I did my best and am happy with the outcome!
June 23, 2015
The pattern I've designed for "Tristan's Path" uses a modified version of a traditional block sometimes called "Rob Peter to Pay Paul," "Wanderer in the Wilderness," "Mill Wheel" or "Drunkard's Path." Tristan chose this pattern from a book when he was about fifteen years old and I was beginning his sister Zoe's quilt for college.
Tristan likes order in his life, and though the shapes of the pattern appealed to him, I wanted to infuse a sense of organization into the seemingly random construction. And I'd watched a video from Missouri Quilts after which, rather than using the special foot I'd bought (called "CurveMaster") for piecing this quilt on the machine, I decided to use the short cut method from the video at Missouri Quilts.
Little did I know just how tricky centering a circle in a square block with even length sides would be. Eventually, after ruining a few sewn blocks by cutting them and then finding the circle hadn't been truly centered, I hit on my own solution. Rick cut a template from mylar for me, circle in a square, and I placed the circle and pinned it in place. Then I blanket-stitched it to the square, turned it over, folded it in quarters to find the exact center of the circle, marked it with a disappearing marker. When it began disappearing before I could trim the block, I remarked it with permanent ink (it was on the back of the block, after all!) I then measured from the center of the circle four and three quarters of an inch to the side and sliced the block, repeating on all four sides (and my rotating Olfa Mat was very handy for that!.) Finally having squared the block to the circle, rather than centering the circle to the block, I was able to quarter each block and begin designing with them. And as his college will be in a cold climate, I left the double layer of fabric in the circles for extra warmth.
Putting the quarter-blocks together required some concentration to get the 'path' to align in a diagonal way, and I gave myself a mantra to keep it going: referring to the placement of the arced corner, one row was "left low, right high, left low, right high..." and the alternate row was "right high, left low, right high, left low..." It helps, really it does.
Now that I have both the front and back center panels finished, I can move on to the borders. Stay tuned!
June 11, 2015
I've begun "Tristan's Path"

May 29, 2015
 Happy Independence Day!
I've been busy the past two weeks making kits for the 2015 Row by Row™ "Windows on the Water" pattern.
But in the last two days, I was able to make the Row by Row™ Tote Bag, using the free pattern provided by Timeless Treasures, who produced the fabric for this water-themed year. I did order one of their Tote fabrics, and am selling those in 1/2 yards with the free pattern downloaded and printed for my quilting visitors.
I didn't purchase the remaining fabrics as I know each quilter has their own stash of favorite but as yet unused fabric, and thought this might be a good project for that. I chose to use the Buoy Fabric by Benartek for the bag body, the Timeless Treasures Row by Row fabric for the outside pocket, and a floral print thin cotton for the linings.
 What is most satisfying to me, though, is that I made the tote totally on my hand crank machines out in the shop. I began it on the 99, then moved to the Red Eye 66, and then back to the 99. Both machines are still awaiting new check springs for the upper tension assemblies, but even with the damage I'd done to those springs when I tried to remove them ('unspringing" their slinky-like appearance) they maintained a nice even stitch through a full bobbin and more of quilting!
 The straps of the bag are made of scraps of the water fabric rows ... I pieced the straps with six inch lengths of water, wrapped the thirty inch long strip around regular 3 oz. polyester batting (which I also used between the bag fabric and the lining) and quilted both the straps and the bag itself with multiple verticle columns of stitches. I also lined the outer pocket with the floral cotton and did a few rows of curvy horizontal rows of quilting, following the print of the fabric. The pattern itself was a bit squirrely about how to fold and stitch the box corners at the bottom, but I did my best and am happy with the outcome!
June 23, 2015
The pattern I've designed for "Tristan's Path" uses a modified version of a traditional block sometimes called "Rob Peter to Pay Paul," "Wanderer in the Wilderness," "Mill Wheel" or "Drunkard's Path." Tristan chose this pattern from a book when he was about fifteen years old and I was beginning his sister Zoe's quilt for college.
Tristan likes order in his life, and though the shapes of the pattern appealed to him, I wanted to infuse a sense of organization into the seemingly random construction. And I'd watched a video from Missouri Quilts after which, rather than using the special foot I'd bought (called "CurveMaster") for piecing this quilt on the machine, I decided to use the short cut method from the video at Missouri Quilts.
 |
| blue on white |
 |
| white on blue |
Putting the quarter-blocks together required some concentration to get the 'path' to align in a diagonal way, and I gave myself a mantra to keep it going: referring to the placement of the arced corner, one row was "left low, right high, left low, right high..." and the alternate row was "right high, left low, right high, left low..." It helps, really it does.
Now that I have both the front and back center panels finished, I can move on to the borders. Stay tuned!
June 11, 2015
I've begun "Tristan's Path"

May 29, 2015
Happy to say I finished the two toss pillows to go with the beautiful hand-pieced quilt that I bound earlier this week.


May 28, 2015
And while I'm working on his college quilt, I'll be planning and beginning to cut the crazy quilt for my niece. She is a ballerina and is beginning her graduate program toward a doctorate in physical therapy. She's been dancing since her early years and has many costumes that will be incorporated into the crazy blocks. I'll post photos of that one as it begins to develop.
March 21, 2015 Books in Bloom at the library
March 14 2015, Pi Day~
Binding and a Label: Finished!
March 13 2015
Designing the back
 It took a long time to figure out how to use the rest of the fabrics in the back of the quilt. Some were images that required a larger block than those I used on the front. I put it off as I continued to think about where to put special images that held meaning for Dorothy's family. Her favorite musicians, Barbara Streisand and Paul McCartney have blocks, as does her good friend Denise who also battled cancer.
Amazingly, a month of snow, snow and more snow went on, and here it is, the middle of March. But the quilt will be ready for pickup tomorrow, as promised. A night of quilting and a binding remain.


February 17, 2015
Setting a pattern
May has brought some strange weather this year; the lilacs suddenly bloomed one day in bright, warm sunshine and are now drying out as we haven't had the rain that is currently flooding Texas. But with the cold gone, I've been able to return to working on quilts.
The beautiful hand-pieced quilt that a customer brought to me almost a year ago has been quilted recently by a friend of mine at the quilt guild ... the quilt was going to be larger than any I'd handled on my Bernina 125 before, and so I asked the customer if she would mind my passing it along to my friend Jeanne who does beautiful free motion quilting with just her domestic machine. And it is a beautiful quilt as a result. I did the binding yesterday, and am making a few toss pillows of the remaining fabric scraps. I'm posting the picture here, though the majority of this is not my work.
 |
| The blocks were hand pieced by the owner more than twenty years ago. |
 |
| The free motion quilting was done by Quilts, Etc. and I added the two color binding with what fabrics were left. |
 |
| The colors in this quiil are just lovely together. |
 |
| Tristan's college quilt fabrics |
I've also begun making my grandson's "Drunkard's Path" quilt, and hope to finish that for his first college year beginning in September. Rick cut the templates for the pattern for me, but I've since found a Youtube video that simplified the cutting and piecing. The quilt will be two sided, as was my sister Pat's quilt; I'll use seashell fabric in blue and white for one side, and night sky fabric with shimmer stars for the back.
 |
| Kim as the Sugar Plum Fairy |
June will be a busy month here at Quilters' Quarters! And this year's Row by Row even will begin during the last week.
March 21, 2015 Books in Bloom at the library
More than thirty floral arrangements that embodied favorite books were on display. Many of those were also donated to the raffle fundraiser. My friend Bev Knapp won my arrangement and book ... Happy endings!
The fabric vase holding fabric flowers made of yo-yo design is meant to represent the beautiful fabric in the shop featured in my first mystery book, The Quilter's Quarters.
The fabric vase holding fabric flowers made of yo-yo design is meant to represent the beautiful fabric in the shop featured in my first mystery book, The Quilter's Quarters.
  |
March 14 2015, Pi Day~
Binding and a Label: Finished!
 |
| The quilt front |
 |
| The back, or the other front! |
March 13 2015
Designing the back
It took a long time to figure out how to use the rest of the fabrics in the back of the quilt. Some were images that required a larger block than those I used on the front. I put it off as I continued to think about where to put special images that held meaning for Dorothy's family. Her favorite musicians, Barbara Streisand and Paul McCartney have blocks, as does her good friend Denise who also battled cancer. Amazingly, a month of snow, snow and more snow went on, and here it is, the middle of March. But the quilt will be ready for pickup tomorrow, as promised. A night of quilting and a binding remain.
February 17, 2015
Setting a pattern

Despite the continuing snowfall, I was able to work on the quilt design for the memory quilt; I had to "frog" one long seam, and decide which emblems will decorate the plain white blocks, but here is what I have for the front of the quilt, so far. I'll add borders and then design the back tomorrow.
Here are some of the machine applique white blocks:
 |
| Cape Cod |
 |
| Mass. General Hospital Cancer Center |
 |
| Leukemia Team |
 |
| North Shore Medical Center |
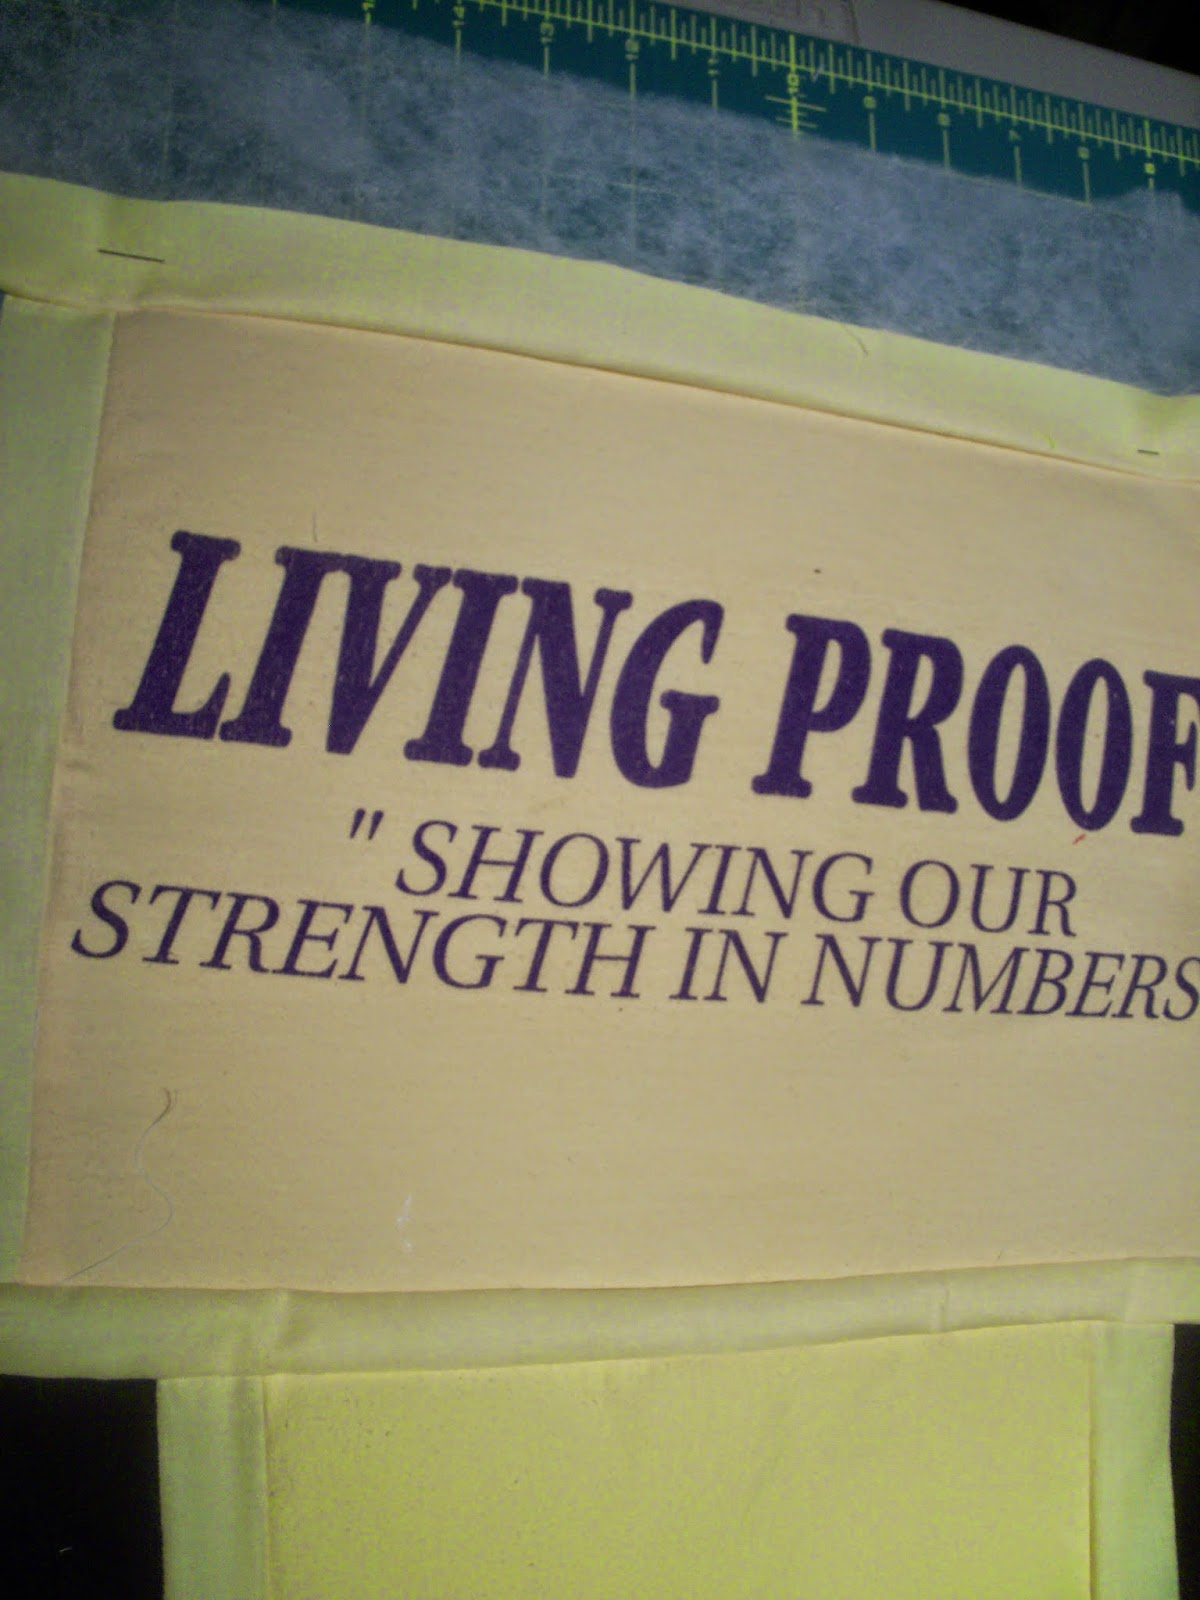
And here are the printed T-shirts for the front...
 |
| North Shore Medical Center |
 |
| Team Dorothy's T-shirts |
 |
| Add caption |
There are more and quite different T-shirts for the back of the quilt. Stay tuned.
February 11, 2015: We've only just begun ...
In the fall, a customer came and asked if I could make a memory lap quilt for her dad, of her mother's many T-Shirts. Her mother had cancer, and walked in fund raisers that benefited research toward treatments and cures. She said she didn't need it in a hurry; she just wanted to know that it could be done. And so she left me with a shopping bag full of T-shirts and other articles of clothing. The fall months passed, and winter began. The calendar changed to a new year, and I took out the clothing in January while working to complete another Crazy Daisy quilt for someone. When I finally began, near the end of January, the fall and winter pace caught up with me, and as anyone with multiple sclerosis or other chronic condition knows, fatigue is more than "just tired." I was down for the count.
But by the fifth snowstorm (we've had "more than sixty inches in seventeen days" according to one newscaster) I began to feel better and started sorting the clothing into related color piles. I've put some aside for the front and some for the back. This week, I've begun ironing interfacing on the backs of the T-shirts to stabilize them - of course, as this is clothing one might assume it's already been washed over and over. But some of the T-shirts are really collectible and may not have been worn more than once, perhaps at a family gathering, or collected at the end of a fund-raising walk. So I pre-washed them all, just to be cautious about uneven shrinkage. I read the directions on the fusible interfacing, put them in the dryer without fabric softener (as directed) and had shirts clinging all over me when I took them out. I set them aside for the night and began again the next day.
As I worked with her clothing, centering and cutting blocks a bit larger than I would need so that I could 'square them up' once the fusing was done, I thought about this woman, her family, her friends who shared her journey (one of whom is named on one of the T-Shirts) and I wondered at the parallels in our lives. I have quite a collection of shirts of my own upstairs, and some bear my name; will I make a T-Shirt quilt of them one day while I still can? Who will want it?

This quilt is wanted. Dorothy's daughter will give it to her dad (whose name also appears on the 'family tree' blocks of this collection.) I thought once I'd have it ready for Valentine's Day, but those two weeks of lost days has made that unlikely. I'll just have it finished for the day I have it finished.
I've already changed the design two or three times, and ripping out stabilized T-Shirt fabric is not as easy as it might seem! It will be about 45" by 60" when finished ... the golden rectangle wins!
***** ***** ***** *****
January 20, 2015: It's finished!


January 19, 2015
It's a new year, and a new page for my quilt journal, For years I have kept a journal of quilts designed and made for family and friends in a spiral notebook of graph paper pages. But it's pretty full now, and I'm not as organized in keeping my preliminary sketches and calculations of yardage (because I don't have to calculate yardage any more - I buy whole bolts for the shop!)

When I finish this one up, I'll start on another snowflake quilt and plan to finish that in time for our public library's third annual quilt exhibit.

Rick has been busy cutting metal rods to display the many quilts more uniformly throughout the various rooms in the library. We have more than twenty local quilters who will be sharing their talent for the month of February and March.
I still have a few commissioned quilts to make of clothing saved and loved. I think I remember that one was perhaps for a Valentine's Day gift, so that will have to begin early next week, following the snowflake quilt.
Busy busy busy~ Do what you love, and love what you do!
Visit more pages at our blog; see the table of contents in the right hand margin of any page, click a page and see what we've shared~
ReplyDelete